
The Perfect Shaggy Pixie Cut by Tom Warr
How To Cut A Shaggy Pixie: A Step-by-Step Guide
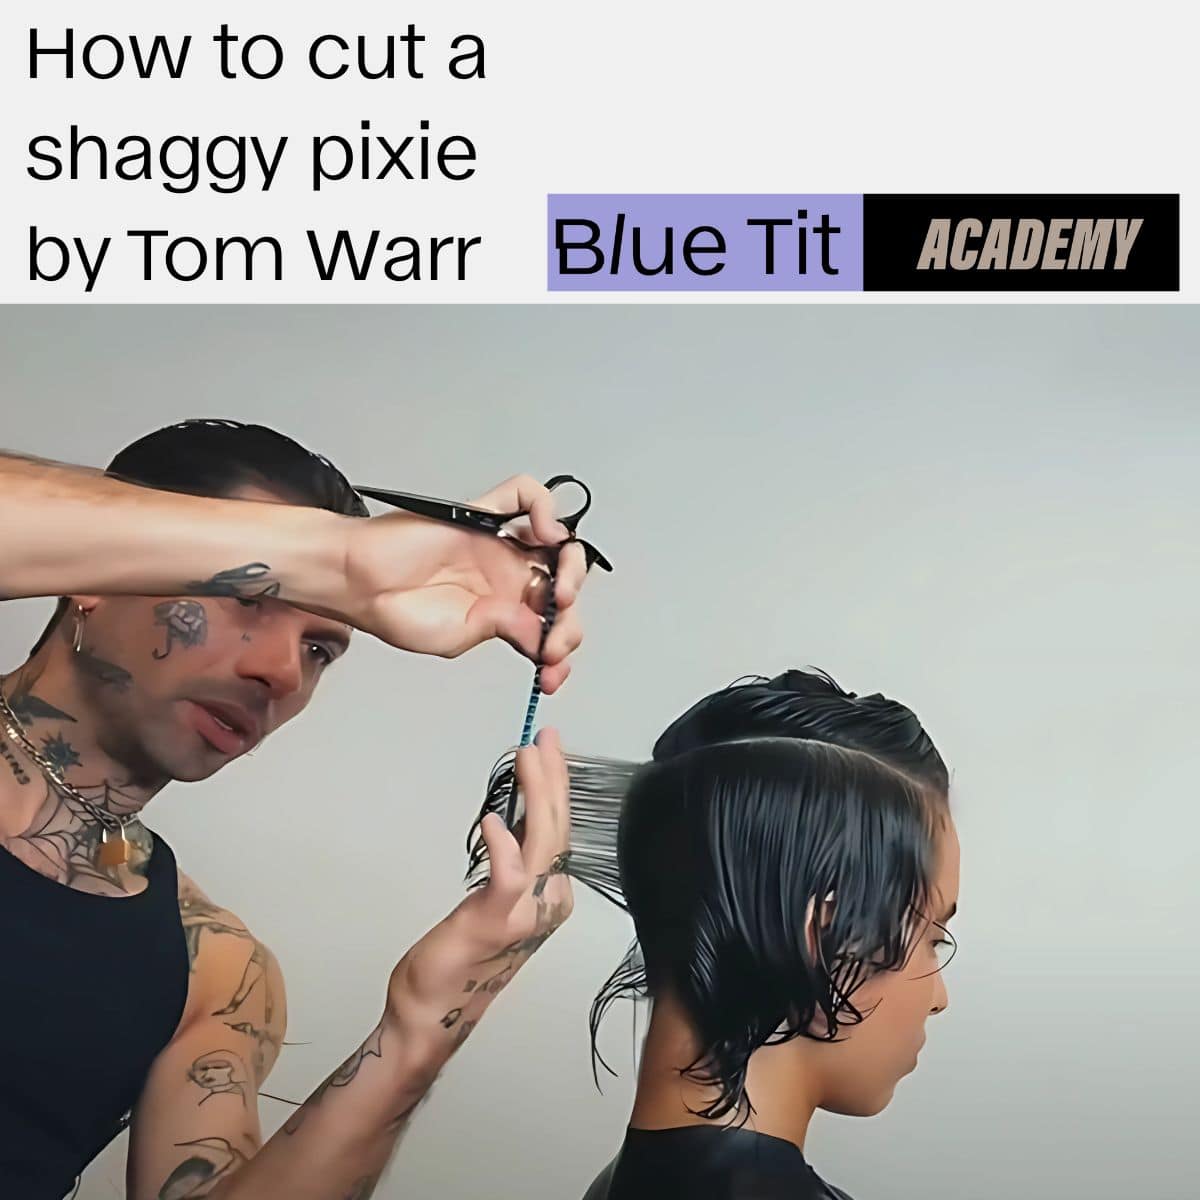
In today’s tutorial, Tom Warr takes us through crafting the classic shaggy pixie cut. A look that’s both edgy and effortless.
In this guide, we’ll walk you through three essential areas to master cutting a shaggy pixie:
- Graduation
- Layering
- Styling
So let’s get into it…
1. Graduation: Building the Foundation
To start, we create a horseshoe section from recession to recession. This helps separate the back and sides from the top, ensuring clarity and balance throughout the cut.
We’re working with round graduation through the back, this provides a soft, natural shape.
Key tips from Tom
Move your guide into each new section.
Move your body correctly around the head to avoid over-direction and unwanted weight.
Choose a length that sits loose and shaggy when textured, but still cropped enough to retain that signature pixie feel.
On the Sides:
We maintain weight and length by over-directing each section back, especially just behind the ear. Around the ear, we direct the hair upwards to preserve even more length. This technique gives the pixie a looser, more wispy and shaggy texture.
At the front, where the hair is longest, we refine by shortening slightly using horizontal sections for greater control.
2. Layering: Removing Weight, Adding Texture
Moving into the layering phase, we use round layers to reduce weight and create a head-hugging shape.
Start with a central guide.
Choose a length that lightens the weight without sacrificing the shaggy aesthetic.
Follow the natural head shape as you work your guide into each new section.
Pro Tip:
Graduation builds weight and shape.
Layering removes weight and adds texture.
Cut graduation inside your fingers, and layers outside your fingers for ease and accuracy.
To connect the top and bottom seamlessly, use the same graduation technique underneath, ensuring flow and maintaining the structure and shape already created.
3. Styling: Bringing It to Life
To finish, we bring the look to life using styling products and a diffuser.
Products Used:
Boho Pomade by Oway – adds light hold with a natural finish.
Next Day Cream – adds a touch of shine and a more tousled effect.
Work the products through the hair and comb them evenly into place. Use your fingers to mold the shape, and apply flat clips to hold any key areas. Then, diffuse to enhance natural texture.
Once dry, use a visual slicing technique to remove any excess weight and add that final touch of effortless movement.
Final Thoughts
The shaggy pixie cut is all about the balance between structure and texture and between polish and playfulness. With the right technique and a few thoughtful product choices, you can create a cut that feels modern, wearable, and full of personality.
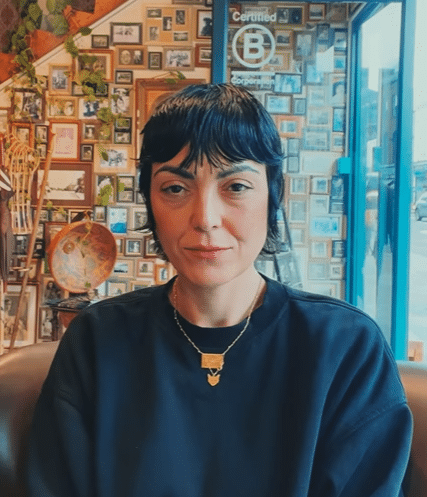
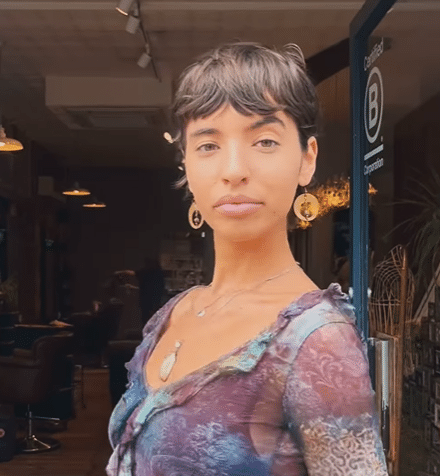
What is a Shaggy Pixie Cut?
A shaggy pixie cut features short hair at the back and sides, with longer, textured layers on top. This layering adds volume and movement, creating a tousled, effortless appearance. The style can be tailored with varying lengths and fringe options to suit different face shapes and hair textures.
Benefits of the Shaggy Pixie Cut
- Low Maintenance: Its short length and layered structure make daily styling quick and straightforward.
- Volume and Texture: Ideal for adding fullness, especially to fine hair, due to its choppy layers.
- Versatility: Can be customized with bangs, undercuts, or varying lengths to complement individual features.
For other short hair inspiration check out some more short hair styles we love here.
Shaggy Pixie Styling Inspiration


If you thought this tutorial was helpful, check out our YouTube Channel and our Academy for courses.
Hair Stylist Tom Warr is part of the Creative Team here at Blue Tit London. Find him at Blue Tit Dalston.


